ReGlass
ReGlass is a 3D screenshot and video capture tool for Looking Glass Portrait. It works with more than 500 games.
UPDATE: You can now play all of the games supported by ReGlass as real-time moving holograms!
How Does it Work?
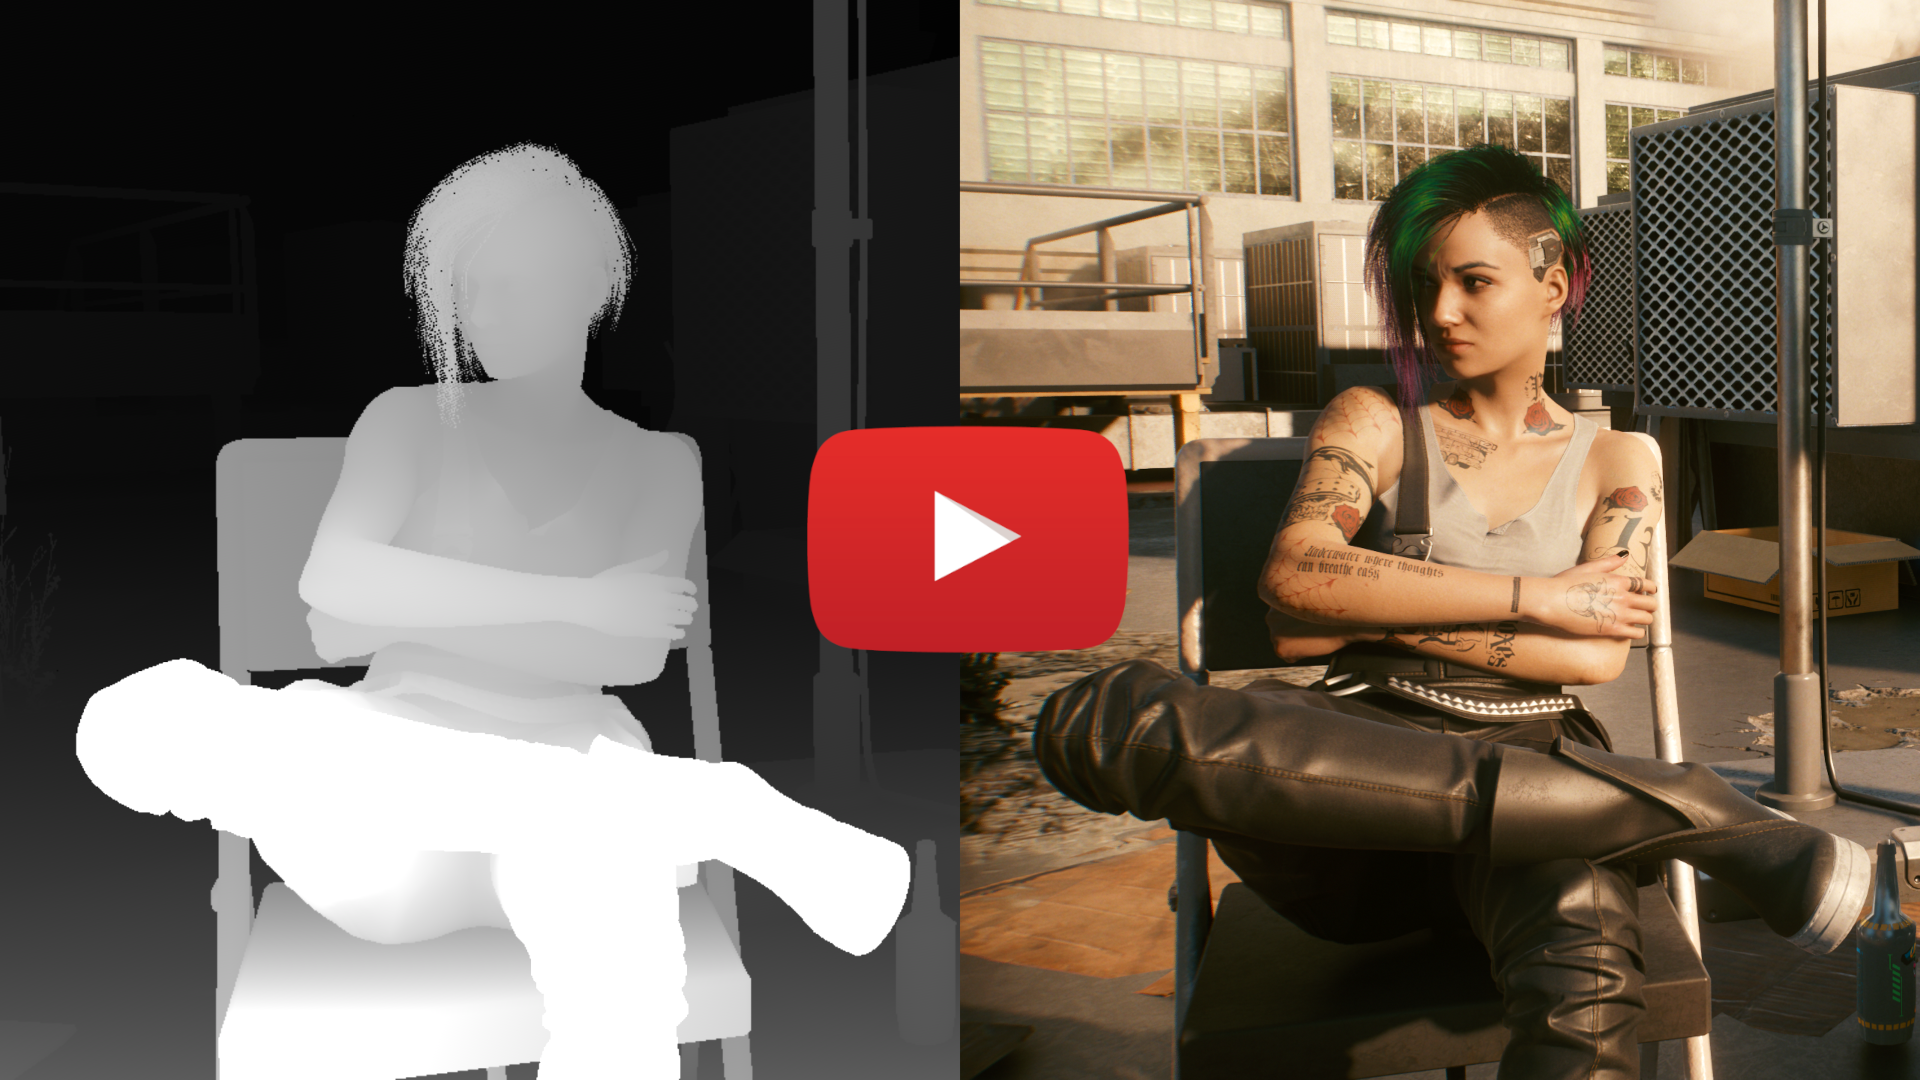
ReGlass draws the game with color on one side and depth on the other. If a screenshot is taken or a video captured, it can be imported into Holoplay Studio as a RGB-D Photo or Video.
NOTE: When taking screenshots or capturing video, don’t use screenshot or capture facilities built into the game. This is because the game isn’t aware of ReShade and won’t include the depth information. Instead, use the screenshot feature in ReShade (usually PrintScreen) or external tools like the Windows Game Bar (Win + G) or NVIDIA Overlay (Alt + Z).
Why ReShade?
There are several reasons why ReShade was chosen:
- ReShade works with a massive list of games, and more than 500 of them support depth.
- ReShade has an incredible community with ~15k members and ~4k active at any given time.
- The community is constantly adding new games, and if an update breaks an existing game it’s addressed quickly.
- ReShade is easy to develop on with many public samples.
- It offers an in-game UI that enables users to get exactly the right shot.
Automatic Installation
- Download ReShade from reshade.me.
-
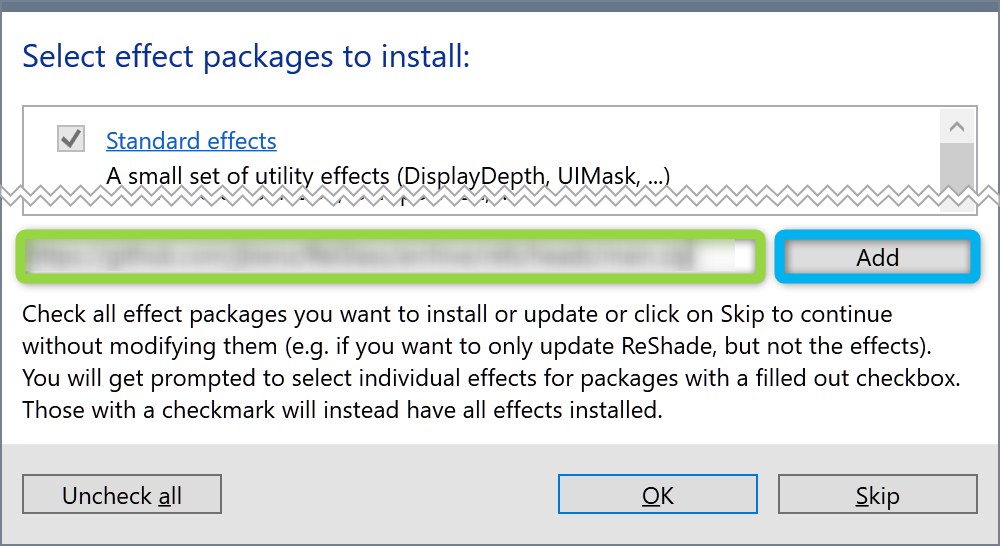
During the ReShade installation, paste in the following URL:
https://github.com/jbienz/ReGlass/releases/download/v1.1/ReGlass.zip - Click the ‘Add’ button to add the archive, then click OK to finish the installation.
Manual Installation
- Install ReShade from reshade.me and enable it for your game.
- Download the latest ReGlass Archive.
- Go to the same folder as your games main executable.
- Go into the sub-folder
reshade-shaders. - Extract the
Shadersfolder from the zip file into the gamesreshade-shadersfolder, merging with theShadersfolder that already exists.
Usage
Depth Settings
Once installed, launch the game and press ‘Home’ on your keyboard to bring up the ReShade menu.
Check the box next to LookingGlass, then use the sliders to achieve the desired depth:
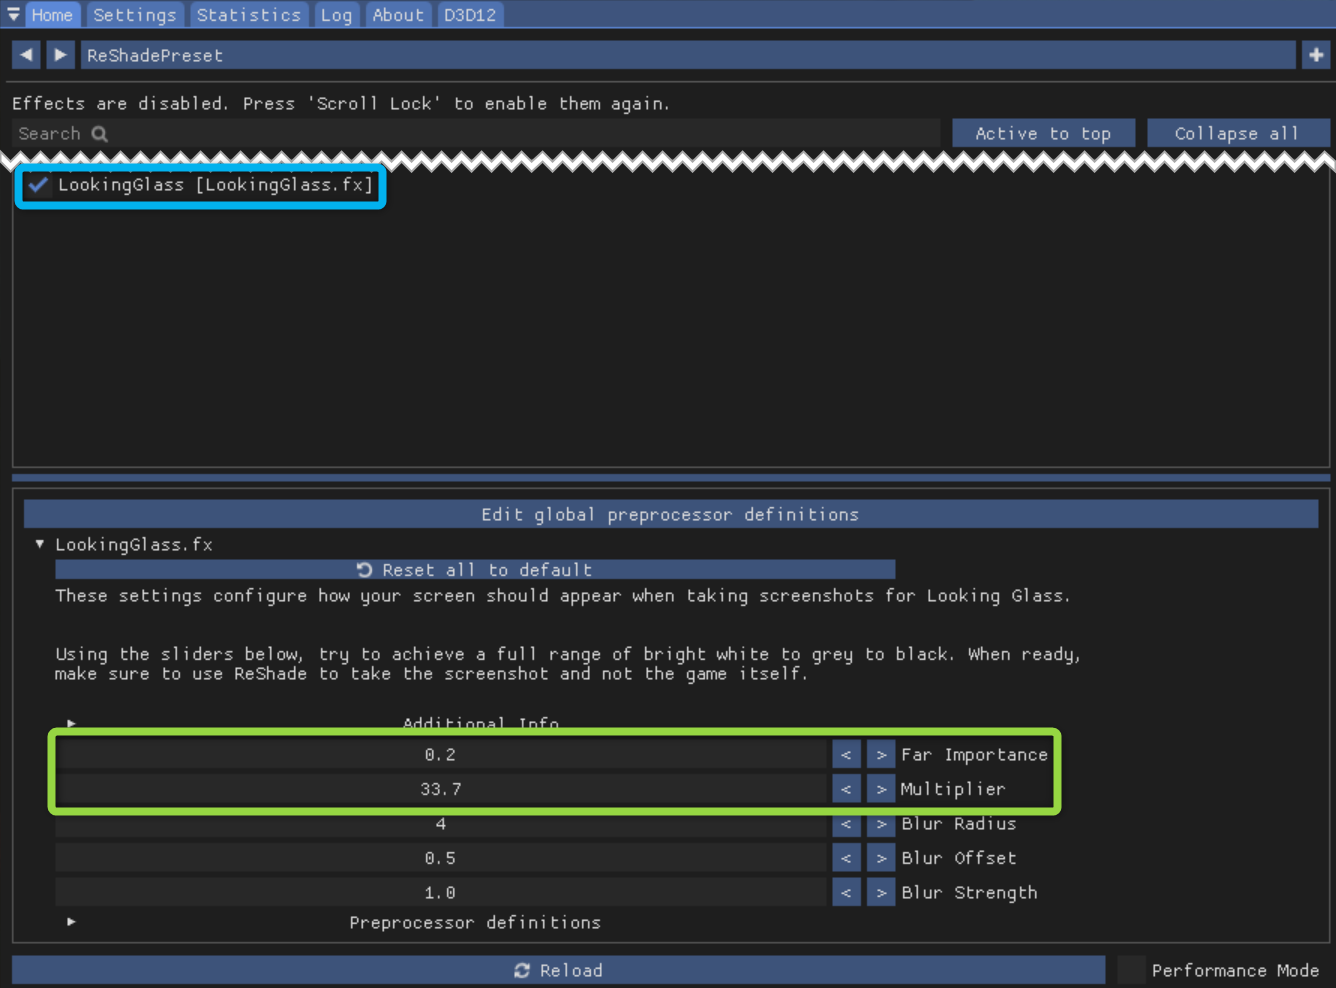
- Wide open shots like skylines: Use high values for Far Importance and low values for Multiplier.
- Close-up shots like selfies: Use very low values for Far Importance and high values for Multiplier.
Blur Settings
The blur settings can be used to “smooth out” sharp differences in the depth map.
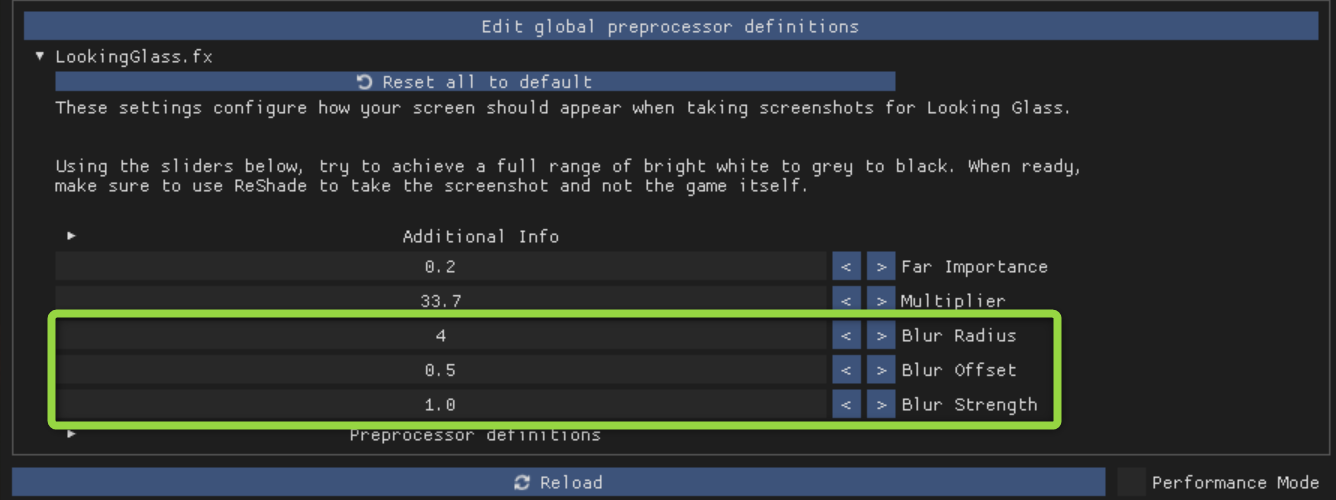
There are three sliders that can be used to adjust the blur, but the defaults should work well for most games.
Why blur the depth map at all?
The primary reason is to make life easier for Holoplay and Refract when recreating the scene.
In CyberPunk 2077, for example, the depth map often has holes and pixelation in areas like hair:
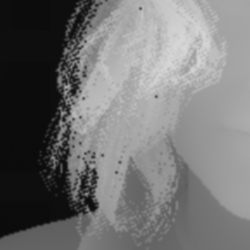
These wreak havoc when Holoplay or Refract try to recreate the 3D surface for the hair. Blurring the depth map fills in holes and smoothes out the pixelation.

It’s also common in games for a subject to be close to the camera when the background is far away:

This again is very difficult for Holoplay and Refract. The sharp contrast between things that are close and things that are far causes tearing in the image. This tearing is especially visible when you view the scene from the sides. Blurring the depth map “rounds off” these sharp edges and creates a smooth transition from close to far.

Smooth transition means far less tearing.
Performance Mode
Performance Mode can be toggled at the bottom of the ReShade menu:

When Performance Mode is enabled you won’t be able to adjust any of the settings above, but in some games it might achieve an additional 15+ frames per second.
How do I make it work with XYZ game?
First, start with the Game Settings page to see if your game is already listed. Next, check the Game Settings Discussion thread. Finally, see the Find Settings page to learn how to configure ReGlass for a new game.
Thanks
Special thanks to Ioxa and Otakumouse for their GaussianBlur shader, which was modified and embedded in this shader to enable blurring the depth map.
About the Author
Jared Bienz

![]() jbienz
jbienz ![]() Road to MR
Road to MR ![]() Blog
Blog ![]() @jbienz
@jbienz
I’m not always online, but my user name is eXntrc on the Looking Glass Discord.
No Express or Implied Warranty. This software is provided “as is”, with all faults. There are no warranties or guarantees, express or implied.